> ## Documentation Index
> Fetch the complete documentation index at: https://docs.hyperx.dev/llms.txt
> Use this file to discover all available pages before exploring further.
# Unity 빠른 시작
> Unity 프로젝트에 HyperX SDK를 설치하고 첫 유저를 생성합니다.
이 가이드는 프로덕션 HyperX 프로젝트를 Unity 클라이언트에 연결하는 가장 짧은 절차입니다. Unity 2021 LTS 이상과 `.NET Standard 2.1` 호환 설정을 권장합니다.
## 1. SDK DLL 다운로드
[HyperX.netstandard2.1.dll](https://public-assets.hyperx.dev/dotnet-sdk-releases/HyperX.netstandard2.1.dll)을 다운로드합니다.
## 2. Unity 프로젝트에 추가
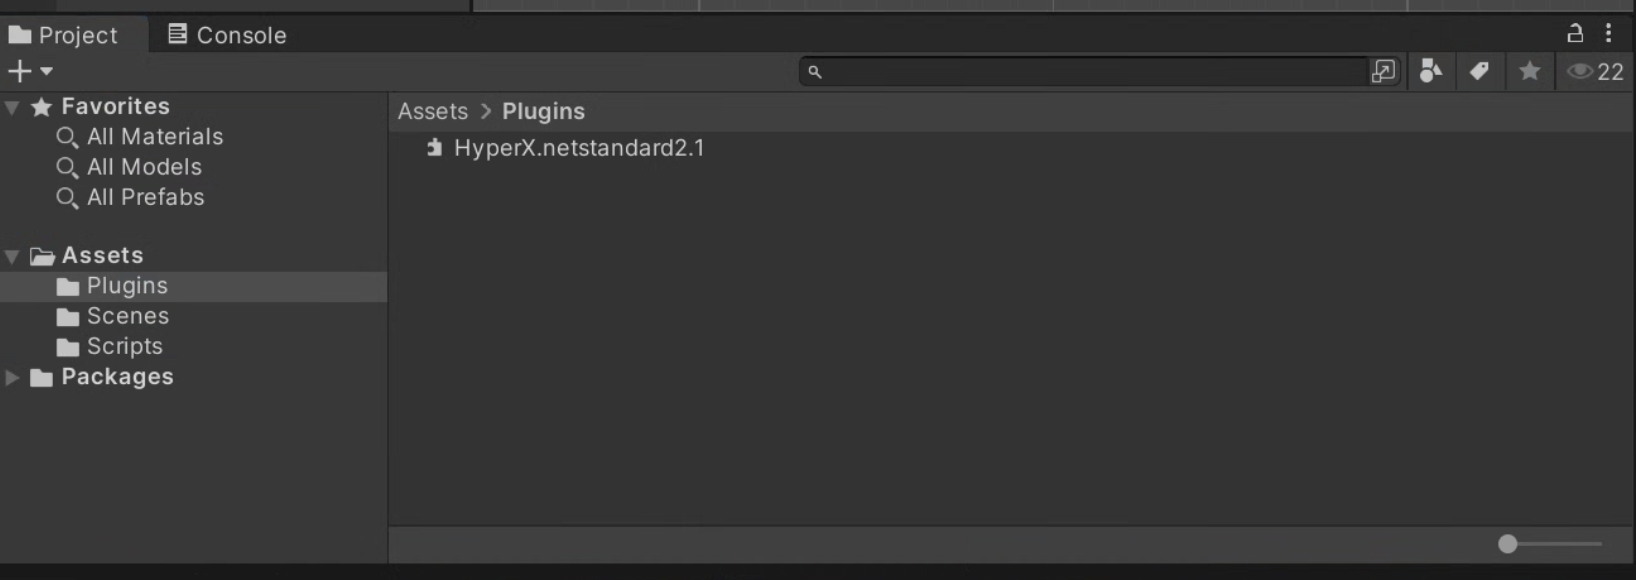
다운로드한 DLL을 Unity 프로젝트의 `Assets/Plugins` 폴더에 넣습니다.
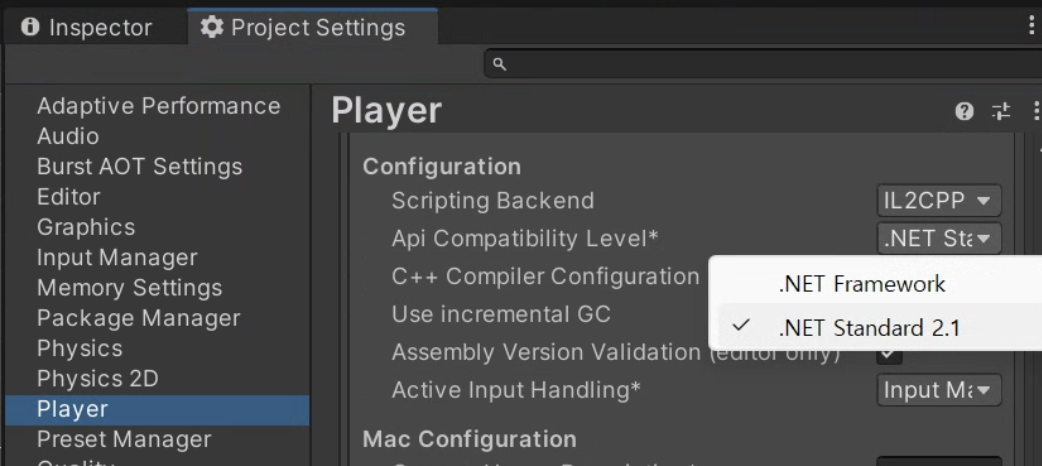
 Unity `Player Settings`에서 `Api Compatibility Level`을 `.NET Standard 2.1` 이상으로 설정합니다.
 ## 3. 프로젝트 코드 확인
Console에서 프로젝트를 열면 URL 또는 프로젝트 설정 화면에서 프로젝트 코드를 확인할 수 있습니다. SDK 초기화에는 이 코드가 필요합니다.
## 3. 프로젝트 코드 확인
Console에서 프로젝트를 열면 URL 또는 프로젝트 설정 화면에서 프로젝트 코드를 확인할 수 있습니다. SDK 초기화에는 이 코드가 필요합니다.
 ## 4. SDK 초기화와 게스트 유저 생성
빈 GameObject에 아래 스크립트를 붙이고 `PROJECT_CODE`를 Console의 프로젝트 코드로 바꿉니다.
```cs theme={null}
using UnityEngine;
public class HyperXBootstrap : MonoBehaviour
{
async void Start()
{
await HyperX.Core.Init("PROJECT_CODE");
var player = await HyperX.Core.Users.StartGuestSession(
authenticationToken: SystemInfo.deviceUniqueIdentifier,
country: "KR",
language: "ko"
);
var me = await player.Me();
Debug.Log($"HyperX user: {me.Id}, name: {me.Name}");
}
}
```
실행 후 Console의 `Users` 화면에서 생성된 유저를 확인합니다.
`StartGuestSession`은 토큰을 포함한 플레이어 세션을 반환합니다. 이후 유저 데이터, 랭킹, 쿠폰, 알림, 채팅처럼 로그인 유저가 필요한 기능은 `player.PutUserDataJson(...)`, `player.SubmitRankingJson(...)`, `player.Notifications(...)`처럼 access token을 직접 넘기지 않고 호출할 수 있습니다.
## 다음 단계
게스트, 커스텀 계정, 소셜 로그인, 세션 갱신을 연결합니다.
공유 데이터, 유저 데이터, 캐릭터 데이터 저장 방식을 선택합니다.
CDN 파일을 해시로 확인하고 필요한 경우만 다운로드합니다.
친구, 우편, 쪽지, 길드, 알림을 게임에 붙입니다.
## 4. SDK 초기화와 게스트 유저 생성
빈 GameObject에 아래 스크립트를 붙이고 `PROJECT_CODE`를 Console의 프로젝트 코드로 바꿉니다.
```cs theme={null}
using UnityEngine;
public class HyperXBootstrap : MonoBehaviour
{
async void Start()
{
await HyperX.Core.Init("PROJECT_CODE");
var player = await HyperX.Core.Users.StartGuestSession(
authenticationToken: SystemInfo.deviceUniqueIdentifier,
country: "KR",
language: "ko"
);
var me = await player.Me();
Debug.Log($"HyperX user: {me.Id}, name: {me.Name}");
}
}
```
실행 후 Console의 `Users` 화면에서 생성된 유저를 확인합니다.
`StartGuestSession`은 토큰을 포함한 플레이어 세션을 반환합니다. 이후 유저 데이터, 랭킹, 쿠폰, 알림, 채팅처럼 로그인 유저가 필요한 기능은 `player.PutUserDataJson(...)`, `player.SubmitRankingJson(...)`, `player.Notifications(...)`처럼 access token을 직접 넘기지 않고 호출할 수 있습니다.
## 다음 단계
게스트, 커스텀 계정, 소셜 로그인, 세션 갱신을 연결합니다.
공유 데이터, 유저 데이터, 캐릭터 데이터 저장 방식을 선택합니다.
CDN 파일을 해시로 확인하고 필요한 경우만 다운로드합니다.
친구, 우편, 쪽지, 길드, 알림을 게임에 붙입니다.