> ## Documentation Index
> Fetch the complete documentation index at: https://docs.hyperx.dev/llms.txt
> Use this file to discover all available pages before exploring further.
# Unity Quickstart
> Install the HyperX SDK in Unity and create your first user.
This guide connects a production HyperX project to a Unity client. Unity 2021 LTS or later with `.NET Standard 2.1` compatibility is recommended.
## 1. Download the SDK DLL
Download [HyperX.netstandard2.1.dll](https://public-assets.hyperx.dev/dotnet-sdk-releases/HyperX.netstandard2.1.dll).
## 2. Add It to Unity
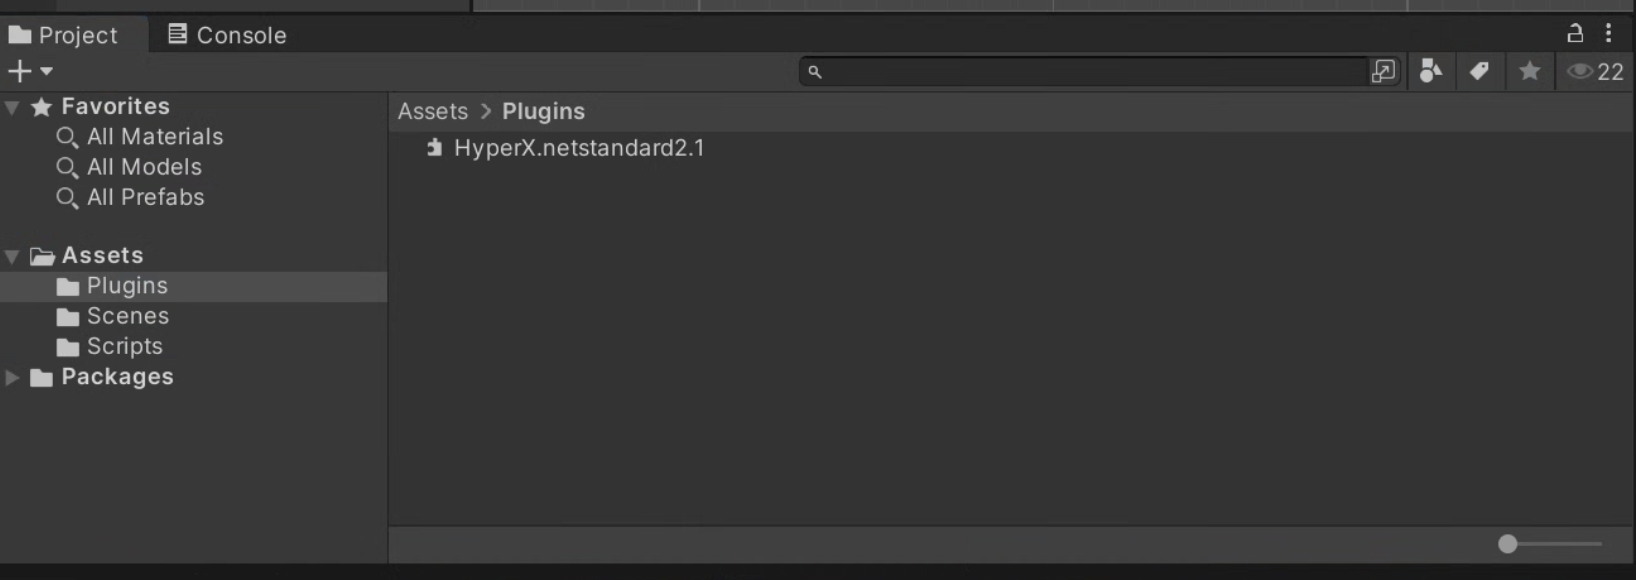
Place the DLL under `Assets/Plugins`.
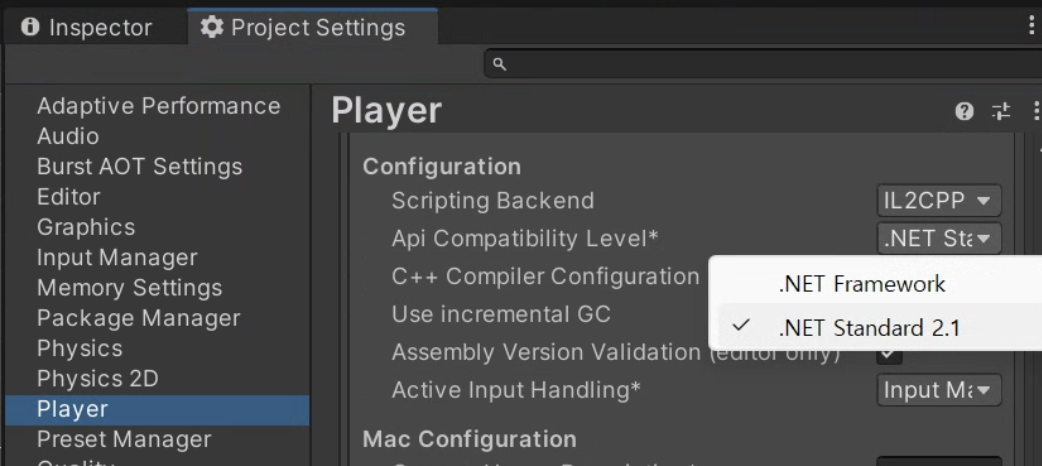
 In Unity `Player Settings`, set `Api Compatibility Level` to `.NET Standard 2.1` or later.
 ## 3. Copy the Project Code
Open the project in Console and copy its project code from the URL or project settings.
## 3. Copy the Project Code
Open the project in Console and copy its project code from the URL or project settings.
 ## 4. Initialize and Create a Guest User
Attach this script to an empty GameObject and replace `PROJECT_CODE`.
```cs theme={null}
using UnityEngine;
public class HyperXBootstrap : MonoBehaviour
{
async void Start()
{
await HyperX.Core.Init("PROJECT_CODE");
var player = await HyperX.Core.Users.StartGuestSession(
authenticationToken: SystemInfo.deviceUniqueIdentifier,
country: "US",
language: "en"
);
var me = await player.Me();
Debug.Log($"HyperX user: {me.Id}, name: {me.Name}");
}
}
```
Run the scene, then confirm the created user on the Console `Users` page.
`StartGuestSession` returns a player session that carries the access token. After that, authenticated calls such as user data, ranking, coupons, notifications, and chat can use `player.PutUserDataJson(...)`, `player.SubmitRankingJson(...)`, and `player.Notifications(...)` without passing `session.AccessToken` through every call.
## Next Steps
Add guest, custom, social login, and session refresh.
Choose shared data, user data, or character data.
Check file hashes and download only changed CDN files.
Add friends, mail, messages, guilds, and notifications.
## 4. Initialize and Create a Guest User
Attach this script to an empty GameObject and replace `PROJECT_CODE`.
```cs theme={null}
using UnityEngine;
public class HyperXBootstrap : MonoBehaviour
{
async void Start()
{
await HyperX.Core.Init("PROJECT_CODE");
var player = await HyperX.Core.Users.StartGuestSession(
authenticationToken: SystemInfo.deviceUniqueIdentifier,
country: "US",
language: "en"
);
var me = await player.Me();
Debug.Log($"HyperX user: {me.Id}, name: {me.Name}");
}
}
```
Run the scene, then confirm the created user on the Console `Users` page.
`StartGuestSession` returns a player session that carries the access token. After that, authenticated calls such as user data, ranking, coupons, notifications, and chat can use `player.PutUserDataJson(...)`, `player.SubmitRankingJson(...)`, and `player.Notifications(...)` without passing `session.AccessToken` through every call.
## Next Steps
Add guest, custom, social login, and session refresh.
Choose shared data, user data, or character data.
Check file hashes and download only changed CDN files.
Add friends, mail, messages, guilds, and notifications.